For each of your crops you should have an “expected yield” value for your best-quality crop. This is what you would expect your optimum yield to be, for each individual crop, in typical growing conditions. Now, optimum yield is different than maximum yield. Optimum yield refers to the yield at which you get the best-quality crop – and this can vary between different systems and markets. Maximum yield is all about getting as much as possible per unit of production. As many of you know – these are not always the same thing! I know I can get close to a kilogram of sunflower shoots from a 1020 trays, but I find the best-quality crop is usually at a 600g to 650g yield.
If you are growing in a totally climate-controlled environment then your expected yield will likely be fairly consistent. But if you are growing in a non-controlled or partially controlled environment, then you are likely to see yield fluctuations, mostly based on temperature, which greatly affects growth rate. Other factors can also affect yield, such as crop disease, germination issues, or other production disruptions.
Growth can be less than or greater than expected so the method you use to recover will vary depending on the situation.
Even though yield fluctuations can be problematic, they can be anticipated and accounted for. In this first section we will look at yield indicators throughout the growing process, then in part two we will look at recovery strategies.
There are four main points in the growing process that can act as yield indicators.
- Pre-sowing weather
- Before you even sow your crop you may be able to anticipate crop yield fluctuations. In non- or partially controlled climates, weather can be an important factor in expected yield. But even in totally controlled environments the outdoor weather can have an impact on production. Weather can both slow down and speed up crop growth.
- Weather can change by season and sporadically within each season, so to maintain consistent yields you will need to account for both. When using sunlight as your main light source, balancing light and temperature can be tricky!
- Mid-Germination
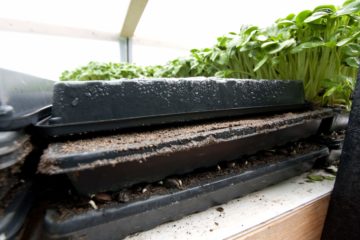
- During your germination process your crop is usually covered, often with weight, and as it germinates it pushes that weight up. The rate at which your crop pushes that weight up is indicative of its growth rate. You should have a good sense of your crop’s growth rate if you have a decent amount of growing experience
- Halfway through your “expected” germination period, you should already have a good sense of how crop growth is progressing. You should be able to see if the rate at which the crop is growing and, keeping in mind the pre-sowing weather, you should be able to see if the crop is growing according to your typical (or adjusted) expectations.
- For example, if the weather is cooler than expected and you are expecting a crop to be a bit behind, you would know this by the middle of the germination process. If you made adjustments to account for cooler weather (e.g., bumped up the heat) you should also have a sense of how well that has been working at this point.
- Post-Germination
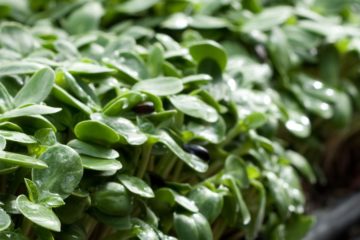
- When you are growing crops on a weekly basis, you learn crop growth rates really well! I always found the point of uncovering from the germination phase the best indicator of crop progress. This is also a really crucial time in determining the overall success of a crop.
- The germination stage is very important for overall crop success. With good germination, a crop can usually tolerate some less-than-ideal conditions for the greening/growth stage of the process. But with a poor germination stage, even optimum greening conditions make a successful recovery difficult.
- If you made adjustments at the halfway point of the germination cycle you should see the results upon uncovering.
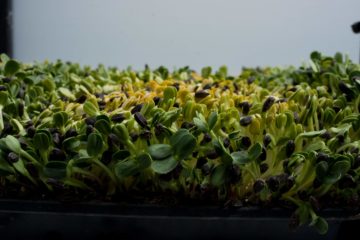
- Mid-Greening
- The mid-greening period is important because it means you are running out of time to make adjustments! At this point you can use both the product size as well as its greening up as indicators. You can still make adjustments at this point, but there is not much time left to see them take effect!
So now we know all the points at which to watch for crop progress, let’s take a look at some adaptations at different points in the process.
Adapting to Weather
- If you can keep a good eye on weather, one of your first strategies can be extending or shortening your growth cycle. This is something can be on a case-by-case basis or seasonally, for example: shortening cycles in the warm season and extending cycles in the cool season (or vice versa, depending on your crops).
- This strategy is most effective on a seasonal basis as adjusting cycles on a case-by-case year round can make task planning difficult. Consistent crop cycles allow you to plan for consistent work schedules.
- If you don’t want to adjust your crop cycles then you can adjust your growing environment (if possible for your situation).
- In cooler conditions, adding a heat source is very effective. Different growing spaces will need different heating solutions which could include space heaters or bench heating. Additional heat is particularly important for the germination stage.
- In the heat, you have a few options
- Extreme heat may require some air conditioning to bring the temperature down
- If you are using sunlight for both light and heat, then shade cloth can be very effective at bringing down the temperature
- For crops where you soak the seed, reducing or eliminating this step can help slow down crop growth
- Another consideration with the heat is ensuring you have good airflow. In hotter conditions disease risk is much higher and increased airflow can help mitigate disease.
- Another thing to account for with weather is the insulation of your growing space. Insulation can reduce the impact of external temperature on your growing space.
Mid-Germination Recovery Strategies
At the mid-germination stage your crop cycle is already in progress, so its length cannot be changed if you have a set harvest date (which you should have!).
At this point, temperature could be an issue which is changing growth rate, but disease could also be a factor. If your trays go into germination and they are too wet you will have a much higher likelihood mold which can reduce yields or destroy a whole crop. To amend things due to disease you have three options:
- Use a sanitizer
- You may have some success with spraying the crop with a 3 % H2O2 solution to kill and mold or disease present, depending on its severity. Do not over do it as H2O2 can also damage new cell growth in your crop.
- Uncover early
- If your crop has germinates well enough that it is rooted into the soil, you can uncover it early. As a rule of thumb, I generally aim towards uncovering early over uncovering late. One reason your crop may be ready to uncover early is that the conditions were particularly warm and your crop saw faster than usual growth – though this may also be a contributing factor to the disease.
- Once you uncover, disease problems often correct themselves pretty quickly
When it comes to temperature, your two main options at this point are:
- Heat things up!
- You can heat up your germination area with a space heater, or with heats pads right below the crop. The advantage of heat pads is you can target specific crops if you so not want to warm up your space too much and affect crops which prefer cooler conditions.
- Cool things down!
- You can use the techniques discussed above to cool things down. At this point cooling things can be tougher than warming, but do what you can.
For both of these temperature cases, one approach is two have two germination areas – one for hot-weather crops and one for cool-weather crops. This gives you a lot of flexibility as you could actually shift crops between the two rooms if needed.
Post-Germination Recovery Strategies
When you uncover your crops you should know almost immediately how on schedule their growth is. Obviously this won’t be as easy when you just start learning to grow, but it becomes second nature very quickly.
Once crops are exposed to the light you have a four different options to deal with crop growth:
- Add a black out period
- Many growers add a black out period after germination where the crop stays covered, but without any pressure on it, usually with an upside down tray. This causes the crop to stretch a bit in order to find light. This can help crop get to “size” but the yield may remain lower as the stretching results in a less dense crop
- Increase or decrease the temperature
- Depending on the crop, you can increase or decrease temperature at this point to change growth rate. One alternative to reducing the temperature is to move your crop into a walk in cooler for half a day or so to slow its growth. In fact, even a few hours may do it. While higher temperature often give higher yields, they can also reduce the quality of your crop and reduce its storage life.
- Eliminate Watering
- It is usually a good idea to water a crop as soon as it is uncovered. Crops appreciate a good drink after several days in germination. But if your crop is ahead of schedule, holding off on watering can stress it out a bit and slow down growth. Different crops react differently to water stress so experiment with different crops. Sunflower can go from wilting and back to normal in a few hours after a watering while peas have a hard time regaining turgidity after they dry out. Never overwater!
- Increase hours of light per day
- Once exposed to light, plans start photosynthesizing to produce sugars. If you have control over lights than you can add a few extra hours to give the plants a boost if they are behind in growth. The extra heat the lights give off (depending on your lights) can also help.
Mid-Greening Recovery Strategies
At this point you are close to the end of your cycle and can continue to try any of the above methods discussed. If your crops end up being ready a day early you can pop them in walk in cooler to halt their growth before harvest. This also removes “field heat” before cutting and packing.
One strategy you do NOT want to employ later in the cycle is eliminating water. Plants must be well hydrated at harvest time to ensure they present and store well.
So, there you have it – some strategies to prepare for and recover from yield fluctuations. Hopefully you find at least one of these tips helpful.
0 Comments